Monday, November 30, 2009

Household pictures

Efah being silly in the grocery bag. I'm telling you, the paper bag has always been the favorite toy in this household.

This is the one picture I got from Nimue where she isn't dodging my camera. I had to be quick. She dislikes the flash. And she's a smart cookie.

Sweet Taquita Banana. She's like a pretzel.

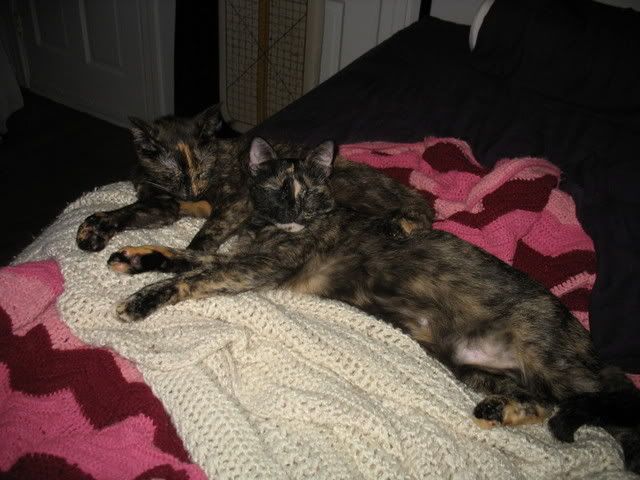
And Roz and Maizy are enjoying some couch lounging time. They are Both in my spot, but they're just so precious there together, I left them alone.

Lord Dunbar relaxing in his kingdom. Not from his Tower of Power, but from his favorite chair with his favorite afgan.

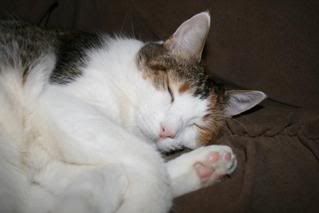
And the pretty pretty princess Nabisco. Mere moments from this photograph Efah hopped in my lap and plopped down right on top of her. She got really mad. He didn't care.

Holiday shopping for my pets

If you're like me and you love your pets like they are family, you are prone to spending quite a bit of your Christmas budget on the little guys before even realizing what you've done. This year I have made a pact to keep the costs down. At least I'm going to try really hard!

My first obstacle is getting a gift for my aging dog, Maizy.


Maizy is a 13 1/2 year old Catahoula Leopard Dog with arthritis. She is in great health, but her arthritic joints deteriorate a little each year. About a year and a half ago I purchased a very large orthopedic bed for her from Petsmart. She loves this bed because it is huge and she can sprawl out any which way she likes while still sharing the bed with whatever cat decides to bed down nearby. However, within a few months, she began to be uncomfortable on the bed because the foam was breaking down and sagging in the middle. That really doesn't offer much support. So I had decided I was going to just buck up and buy one of those high dollar support mattresses from Dr. Foster & Smith. And then I came across something different.

The Snoozzy OrthoAir Dog Bed.

Image courtesy of dogbedsandcrates.com

This bed looks like it meets all of my requirements and then some for a bed:

1. Supportive
2. Washable
3. Scratchproof

And as a bonus, it is easy to travel with as well as it is accident proof! Maizy has also begun to have little accidents in her sleep, so being accident proof is just about as fabulous as it gets for me. And even better, this bed is much cheaper than even the orthopedic bed I already bought her which is none of the above.

So now I know what Miss Maizy Loo is getting for Christmas. But what to get for the cats?

This idea comes via the Modern Cat website, which was then used to suggest cat gifts on Martha Stewart's website. Meet the Cat Eye Bed.

Image courtesy of dogbedsandcrates.com

I am constantly on the look out for new perches, scratching posts, and beds that the cats in my household will enjoy. They tend to cycle through each one whenever their mood strikes for a change. And since everyone of them will go after my furniture when not stimulated to scratch elsewhere, I am forever trying to keep up! This little bed looks like a lot of fun. And you know what? The price isn't bad either. Sure, it's not as cheap as the modulars I got from Target, but this will actually hold the body weight of one or more of my cats. And in general good scratching areas are always somewhere in the $60 range and above. So the function and price both are just right.

I see my Taquita Banana enjoying this bed most of all with Nabisco in at a close second.

The torti girls

And Roz enjoys scratching beneath her as opposed to scratching on a pillar. She would likely enjoy lounging on the top of the bed.

Sweet Rozaline

My other favored option for pet presents is Etsy. I've never shopped for homemade gifts before, but I've been told that there's some good quality crafts out there for both people and animals. And it sure would be nice to support someone directly as opposed to a corporation.

Thursday, November 26, 2009

Rice Cooker Udon Noodle Soup

This is my recipe for rice cooker udon noodle soup. Since I make this soup at my office where there is no sink to wash dirty dishes, I have managed to put this recipe together with very little utensils and measuring devices. This kind of soup is well adapted to changes. You can add just about whatever you want to it, although the base of the soup should stay comprised of Bonito and some sort of seaweed as that is the classic Dashi stock used in many Japanese soup recipes.

This is the small rice cooker I use in my office. I have used it to make regular Ramen as well as to steam veggies and dumplings for my lunch. Thanks to this little rice cooker, I don't have to rely on the microwave.


The first step is to measure out some water for the stock. I use one of those large latte mugs for my soups because they are big enough to hold the noodles and soup contents. They also have a handy dandy little handle which saves your hands from burning when you transport the soup from the cooking area. Fill the mug up to about a 1/2 inch from the top.


Pour the water from the mug in the rice cooker bowl. At this time, you will want to turn the rice cooker on. Go ahead and switch it on to cook as opposed to leaving it on warm.

After you have gotten the water settled, it's time to put in the stock ingredients. For classic Dashi stock, Bonito flakes and Kombu seaweed is boiled together. But then the Dashi is drained so that the Bonito and Kombu are filtered out. I use Wakame seaweed instead of Kombu and leave the Bonito in the soup. It's a personal preference because I want to eat the seaweed and I don't mind eating the Bonito. You can use the traditional Dashi recipe if you're making this at home and want the clean broth.


I measure the ingredients in my hand since I don't have any measuring tools. You can adjust the measurements to taste. Keep in mind that the Bonito will compact, and even some will dissolve, when wet. Additionally, the Wakame will expand quite a lot when re-hydrated.


I use one medium to large sized Shitake mushroom for the broth. I like the depth that it adds to the Dashi. After wiping the mushroom with a little damp cloth, remove the stem. Removing the stem is easy, just hold the cap gently in one hand and the stem firmly in the other, and twist the stem off of the cap. Sometimes you'll have to pull while twisting to make it happen.


Then slice up the mushroom like so.


You can slice the mushroom thinner and leave the pieces long, or you can cube them like I have below. I eat my noodle soup with chopsticks, so I prefer thicker mushrooms.


Then put the mushrooms in the water along with the Dashi ingredients.


I've used a couple of different kinds of noodles for this soup. I've used regular Ramen noodles; I've used soft Udon noodles which are packaged similarly to Ramen; I've used a smaller flat asian noodle that comes in a little nest (I don't read Chinese so I have no idea what these noodles are); and finally I've used these flat Udon noodles. My favorite noodles were the soft Udon noodles, but those come individually packaged at $1/package. So there's extra plastic waste plus the waste of the unused flavor pack. For this blog, I used the flat Udon noodles pictured below. I do like them, however I just found a store nearby which sells the round Udon noodles packaged similarly to these. I will be trying those next time because those soft Udon noodles I liked so much were also round. I like the round ones because they are more dough-ey than the flat noodles.

For this package, I had to measure my own noodles. All the previous noodles had their own portioning methods, this one didn't. So I remembered that the Soba noodles I've purchased before in a similar package had three portions in it. Thus I divided this package into thirds and placed the noodles in the bowl to cook alongside the Dashi ingredients. You don't have to cook the Dashi first, it can all cook together to save time.


The Cons of using this kind of noodle is that they don't fit in the bowl all at once. However, as the noodles cook, they will droop and end up completely submerged. You don't have to cover the soup for it to cook, so not only can you just walk away from the soup until it is done, but that makes one less item you have to take home to wash.


You'll want the soup mixture to cook until it comes to this slight boil. The soup is ready when the noodles are cooked to the desired consistency.


Once everything is done, pour the whole soup into your mug and Enjoy! Sometimes I'll also add a topping of Furikake or a dash of soy just to make things a little different, but it is not needed.

Thursday, November 19, 2009

Lamb Penne Bake

I love casseroles about as much as I love soups. And when either of those includes pasta I'm about as happy as it gets! So this week when I needed a cheap meal I could cook for the week that wasn't bean soup, I turned to a classic pasta bake. There's about a million pasta bakes that this could be based on. This is my take based on my love for adding veggies to spaghetti and my obsession with subbing lamb for beef.

Ingredients:

Olive Oil
Onion
Zucchini
Garlic
Salt & Pepper
Red Pepper flakes
splash of merlot
Ground Lamb
Whole Wheat Penne
Tony Chacherie's/Emeril's Essence
Garlic salt
Tomato Basil Pasta Sauce
Mozzerella
Italian seasoning

Method:

Start out in a skillet with olive oil. Slice onions thinly and stir into skillet coating with the olive oil. Salt onions so that the onions sweat.


Now add the zucchini to the skillet. Salt, pepper and add the red pepper flakes. Stir and saute until they just begin to carmelize.


Now I LOVE garlic, so I put in 4 cloves. You can certainly decrease that to taste. Chop the garlic and add to the skillet. The trick here is to not burn the garlic. Many recipes tell you to add the garlic to the onions as they are sweating. The problem is that garlic burns easily and once garlic burns, it is bitter. So I add my garlic nearer the end. In this case, once I noticed the onion an zucchini carmelizing, I stirred well and added the garlic to the top of the veggies. I did not stir. I just let the garlic hang out on top and kind of steam. Then when it was time to stir because the mixture had carmelized more, that's when the garlic started saute'ing.


This is what the carmelization should look like. Once everything looks like this, it's time to transfer the veggies to the glass pan, so we can use the skillet for the lamb. Once the veggies are in the glass pan, splash a little red wine in and stir. And I really do mean just a splash. Ordinarily you would put the wine into the skillet and use it to deglaze the pan, but I'm using cast iron. I don't want to deglaze my pan. So I added it as a touch after the transfer.


After you've transferred the veggies, you are ready to cook the lamb. Don't wash the skillet, use whatever is left in the skillet to flavor the meat. Add more oil and then the lamb. Salt, Pepper, garlic salt, and Tony Chacherie's is added. Then the lamb is browned.


While the lamb is browning, bring a pot of salted water to boil. Cook pasta until Al Dente.


This is how the lamb looks as it is browning. You can stop here, but I prefer to cook until some pieces have a crust.


See how browned these pieces are? This is a personal preference. Play with the dish and cook to your taste.


Once the lamb is browned to your satisfaction, mix penne and lamb with the zucchini, onions and garlic in a glass baking dish.


Now it's time to add the spaghetti sauce. I cheated and used jarred. But next time I want to use homemade.


Grate the fresh mozzerella and mix into the dish like so.


Then grate more mozzerella onto the top and load into an oven preheated to 350 degrees. Then bake until the sauce is bubbling and the cheese is melted.


This is what the bake looks like once all the cheese is melted. I would have finished the dish off in the broiler to get a good brown on the cheese, however, the pasta pieces sticking out were beginning to over cook, so I went ahead and took it out.


I was hoping this would set up and allow me to cut out my serving like a lasagna. But I don't think I put in enough cheese for it to do that. On one hand, that means my portions don't present solidly when served, but on the other, tons of cheese means tons of extra fat. And more expense since cheese isn't exactly cheap.


As is, my serving just kind of glopped out on my plate. But Man was it good! It didn't need any extra cheese. The only thing I think I would change is I would add some sliced portabella mushrooms to the mix and I would probably add a little more cheese to the top so the pasta is covered. Then I could either leave it in longer or finish it off in the broiler for browning the cheese topping. This is one of those dishes, like lasagna, that will get better as it sits. It was lovely right out of the oven, but as I sat and took my time with it, the flavors seemed to get more prominent near the end of the meal. I think it will be absolutely Heavenly by tomorrow!

To accompany my dish, I had this Castle Rock Merlot. This particular Castle Rock was perfect with the meal. It was subtle and yet hit all the right notes to compliment the tomato sauce and spice. And in fact, it was also the wine I splashed into the dish once the veggies went into the glass dish so it was utilized on both sides of the meal.


This dish is quite a simple one to make, however, it did take quite a bit of time seeing as how I insisted on using the same skillet for the lamb and veggies. Had I used two separate skillets, my time would have been reduced quite a bit. I am not a fan of dishwashing, though, so I much prefer to use as few dishes as possible!

Pasta bakes, like casseroles, make great leftovers. They also freeze well. This is one of those dishes that you could cook in bulk over the weekend and freeze in small portions for when you just need a TV dinner because you don't feel like cooking.

Sunday, November 15, 2009

Efah's big day

Today Efah was doted on quite a lot by a lovely couple who have adopted two cats from us before. The moment we walked into the adopt a pet they saw him and just fell in love. They were so in love they contemplated taking him home. But they just lost one of their older cats to an illness the day before and they just weren't sure they should adopt so soon.

I happen to know both of the cats they adopted and so I know that one of those cats is just about as perfect a playmate match as it gets. I am so hopeful about the prospect of this couple adopting Efah I am nearly beside myself. When they left, there were a few positive signs that they might decide to adopt him. But I would love to have all of your prayers, candle lightings, energy work, and Adoption Dances to see if we can seal the deal. This family is Perfect! And y'all know that I only want Perfect for my sweet little Efie Poo.

And now comes the cuteness! I took some fun pictures of both Efah and Nimue at the adopt a pet on November 1st. I'm just now getting around to sharing them.


Nimue checking out the birds at Petsmart.

At this point, she wanted to eat one.

Efah had a moment of interest as well.

But he just was more interested in getting lots of attention from being on a harness. Isn't he handsome?

DFWCG 18th Century Picnic

This weekend I had two events I wanted to go to. Both were at the same time. I really really really wanted to go to both. And then something happened and I had a lot to work on at home. At that point, I told myself I wasn't going to either event. Then Saturday morning rolled around and after a period of time I decided I needed to get out for a couple of hours. So I thought about it and dressing pretty and playing outside with some Fabulous fellow costumers won out over standing in line for hours waiting to get a book signed. I had friends going to that too, but there was no guarantee we'd be in the same line, yadda yadda yadda, and come to find out some of those friends were still in line by the time the picnic was over and I was driving home. YIKES!!! I'm glad I went to the picnic.

The decision to go to the picnic meant I had to rush to do some finishing touches on converting my Bourgereau dress to a chemise dress. I just needed to make a small repair on the bodice and corsetlet and then I had to put together a quick and dirty bum roll and figure out what the heck I was gonna do with my hair!

The bumroll I made from a dollar store heart pillow. I was originally going to hit the dollar store for cotton balls and make my own bumroll, but then I saw this heart pillow and said Screw That! What would my fabulous Dragon Con roommate who manages to make amazing things out of strange found objects do?? She'd go for the heart pillow. So I went for the heart pillow. I attached some ribbon I already had to the top and opened up the bottom to take some of the filling out. Then I tucked in the pointed extra fabric to round off the bottom. The result is nearly the exact same shape I would have had to cut out and sew up! Mine is messy, but it's Underwear! Nobody's going to see it and this was a 10 minute job as opposed to a half hour job. I only had 10 minutes. Here's a photo of the bum roll partially finished.


The next major challenge was to get my hair figured out. I have naturally curly hair, which is fantastic for 18th century costuming, but I don't have a lot of it, so I wasn't sure how on earth I was going to accomplish the right hair. I also wanted to wear my big straw hat, but I knew I didn't have time to add all the trims and bobs to it to make it look authentic, so I just decided to go without the hat. Luckily for me, I have this fabulous hair fall that I've used for a couple of other costumes. This fall is just about my favorite hair piece ever! I pulled that out of my wig drawer and did a quick and dirty updo with bobby pins and arranged a nice ringet on the side and fluffed my real hair up in the front. It looked Perfect! Except I didn't have any hairspray. And by the time I got ready and went out to grab hairspray on the way to the picnic, my hair had already fallen a little, but I did my best to fix it in the Walgreens parking lot.

Once I arrived at the Fort Worth Botanical Gardens I was greeted by a group of Fabulous looking 18th century ladies and gentlemen! I tell you, the DFWCG has some seriously talented costumers. I am fortunate to be able to acquaint myself with these folks. I took a few pictures, but Crandall was kind enough to take many pictures of our day while the rest of us learned a period dance and played badminton and talked and posed. You can see all of those pictures, once I finish uploading them, at the DFWCG's Flickr stream. The few hours we were at the picnic really weren't enough. It would be lovely if one of these days we could make a longer day out of this particular event.

Here I am in my 18th Century finery.


And here I am after a redux of the pompadour for Saturday night beers. Yep, I went out with my pompadour. It was fun! Although I don't feel as though the picture gets the full volume of the hair. It felt like it was bigger when I was wearing it!

Saturday, November 7, 2009

Regency Riding Habit

It's been a while, but I finally have a bit of the costuming bug again. I have to say that having some inspiration and motivation to make something pretty feels absolutely wonderful! It's been too long since I've wanted to make something and the construction hasn't been some source of stress. But this project is attached to an event that I may or may not attend with the DFWCG. And it marks a step in a new period direction. This costume is also the first new outfit I will construct after my weightloss, so it could possibly be the only thing I have in my costume closet, other than Rennie Garb, that actually fits without the need of alterations. And even better, this costume will be made entirely from stash fabrics and book patterns, so in essence, this dress is FREE!!!!!! I really like free.

When I got this inspiration to make a new dress, I had three dresses in mind. All three were from Janet Arnold's Patterns of Fashion 1. My first option was the c. 1795-1800 Showshill Manor dress with the half robe. I love that dress. I've always wanted to make it. I had two fabrics that would have looked amazing for the project, but unfortunately I didn't have enough of the fabric that was perfect for the half robe. So that one was out.

My second option was the c. 1795-1803 dress from The Victoria and Albert Museum. It's on the same page as the previous dress. Then that dress was ousted because I didn't have any fabrics with the right yardage in the stash that actually went together well.

So then I realized that I had a very large amount of this dull golden-ish fabric for a dress and that the royal blue velveteen I had in the stash just might have enough for a Spencer coat. So I finally opted to go with the c. 1795-1810 Salisbury Museum Riding Habit. I love riding habits. There is little more beautiful than a perfectly put together riding costume, in my humble opinion. Ok, except for a ball gown, but seriously what on earth can compete with a ball gown?

Back to my riding habit...

I know I have plenty of fabric for the dress, and I should have enough fabric for the jacket, but if it turns out that I don't have enough for the jacket, blue velveteen should be easy to obtain and it won't be very expensive at all to pick up what is needed.

Here's the fabrics draped together on my dressform. This is when I knew the riding habit was the one.


I'm not sure if I'm gonna finish it all by next weekend, but it sure feels good to work on it. While my fabrics are hanging dry in the bathroom, I'm working on my shift. I'm using the instructions from Marquise de. I've needed a new shift of this kind for a while, so it will get multi-period use. That makes me very happy.